First off, THANKS TO EVERYONE who replied when I recently posted questions on:
Which heated grips/ installing them?
How to take off the gas tank and disconnecting the *** elbow connection?
How to remove stock hand grips?
12 Volt outlets?
I LOVE to ride as much as possible. So extending my riding season on my 1200 Sport has been helped with the V-twin cylinders pumping out some nice heat on my legs while the gas tank & wings give good wind protection to my knees & shins. Stelvio hand guards, Laminar lip, and heated vest all add up to being able to "comfortably" enjoy riding down into the 40's.
After your help and careful thought, I asked for and received Oxford Heated Grips for Christmas. So here is my review...
Ordered them online from Revzella - excellent service, came in one day.
Once opened, I realized the "Touring" grips surface seemed hard to the touch and a bit short in length. After some online evaluation, I called Revzilla, explained my situation and I ordered the "Sport" grips which have a slightly softer feel with more of a textured grip surface as well as being slightly longer in length. I also arranged a "free" return ship back of the "Touring" grips. The new ones came in 1 day and they paid the 6% state sales tax, again, on the $89.99 price!
I love the look of the 1200 Sport and that includes the handlebar/dash area. So my intent was to install both the Heated Grips and a 12V / USB outlet as a "clean / stock" appearance. I didn't want to look like Thor on a 5-year adventure around the globe with brackets and gadgets bolted everywhere.
FIRST IMPRESSIONS:
Oxford Heaterz are attractively packaged & instructions well written.
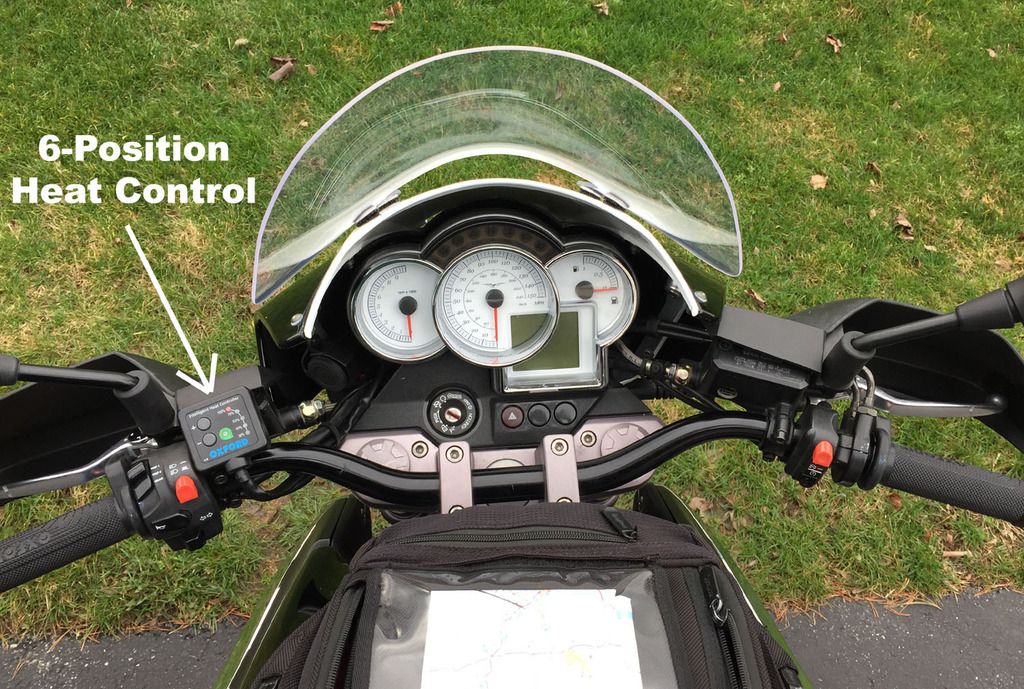
5-levels of heat with up and down buttons.
Power goes on sleep mode after 2 minutes of inactivity and turns completely off after 5-minutes of inactivity.
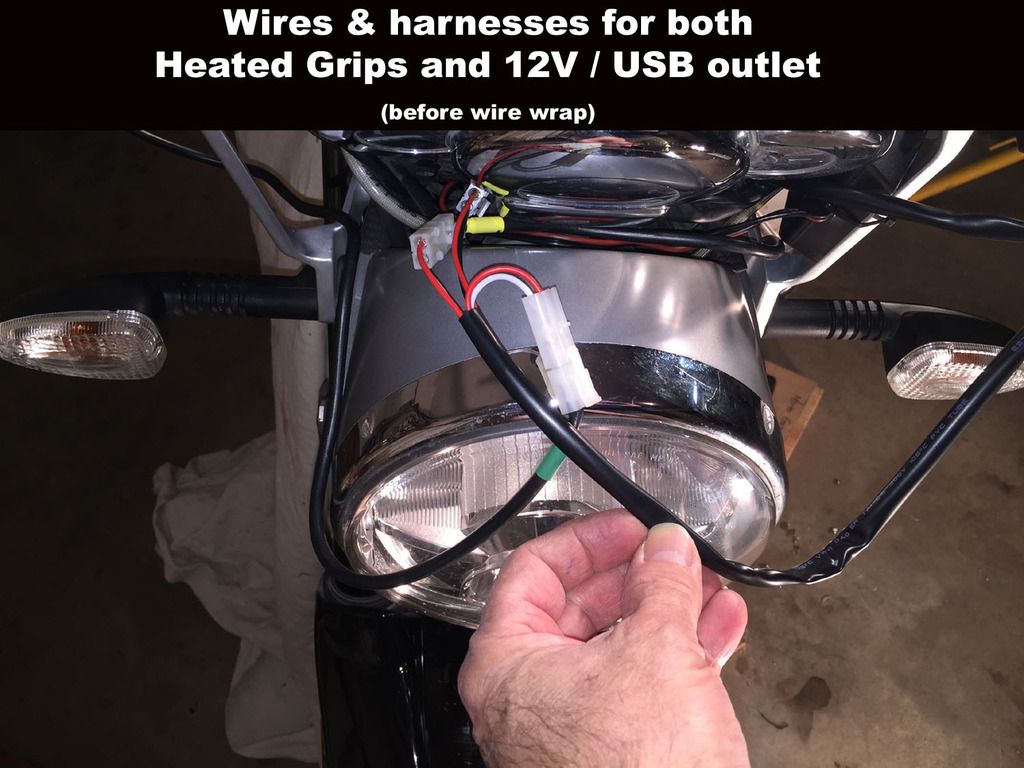
INSTALLATION STEPS for Heated Grips & 12Volt/USB outlets (took about 8-hours, never having done it before)
Siphoned out as much gas as possible to lighten the weight of the gas tank.
Took out 5-srews holding the front black grate.
Disconnect 3-gas lines & 1- electrical connection etc. This was the hardest part because of the elbow connection under the gas tank.
I primed and painted the mounting bracket satin black to go with handlebar hardware.
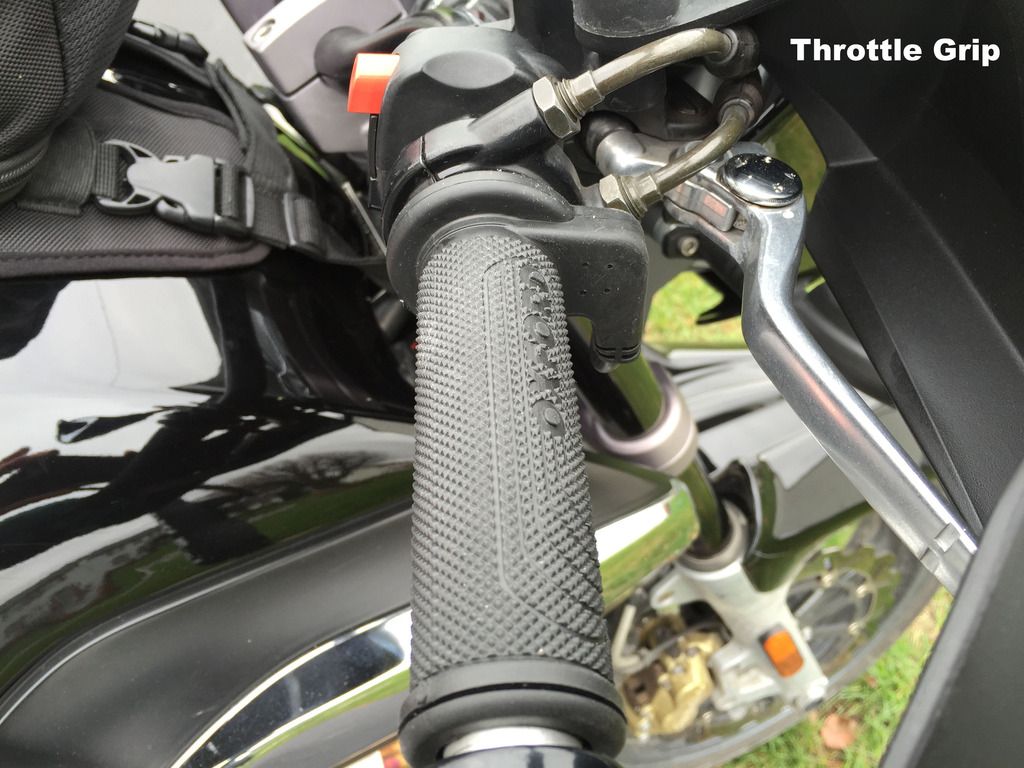
Figured out where to position the grips so the protruding wiring would not interfere with brake & clutch levers as well as the buttons for changing computer readouts and for flashing high beams.
Removed right Stelvio hand guard and small fairing.
Cut & filed down smooth the plastic throttle grip because it had protruding plastic.
Super glued grips into place (no need to wait the recommended 24 hrs., how about 1 minute!!!)
Fished BOTH wiring harnesses above the headlight and back past the steering and along the top frame to the battery. Wired both grips & 12V outlet directly to battery.
Both work! Put all stuff back together. Added gas back into tank and it started up
Went for a test ride after turning grips on 100% high. It was 45 degrees and after only a 4 minute ride, I stopped to wish a riding buddy neighbor Happy New Year. As soon as I shook his hand with my glove on, he commented, "Boy, your hands are warm!" Enough said.
FINAL REVIEW:
Grips start feeling heat in 15 seconds
5-heat settings, 30%, 40%, 50%, 75%, 100%
100% High settinggets HOT even with cold weather gloves. Lowest setting puts slight warmth.
All is first-rate including instructions. Installation looks stock.
Able to reach heat control buttons without taking left hand off of grip.
Grips are a little harder than stock but offer more texture/grip.
Shuts off after 2-minutes of inactivity.
12volt outlet is zip tied on left fairing bracket.
This product ranks a 10 on a 1-10 scale. Could not be happier with the price and the way it warms my hands! THANKS AGAIN FOR YOUR HELP! Here are a few pictures...