Author Topic: Veglia Speedo Trip Counter Repair - A how to  (Read 8257 times)

Offline flangeman_70

  • Gosling
  • ***
  • Posts: 289
Veglia Speedo Trip Counter Repair - A how to
« on: May 19, 2015, 10:33:19 AM »
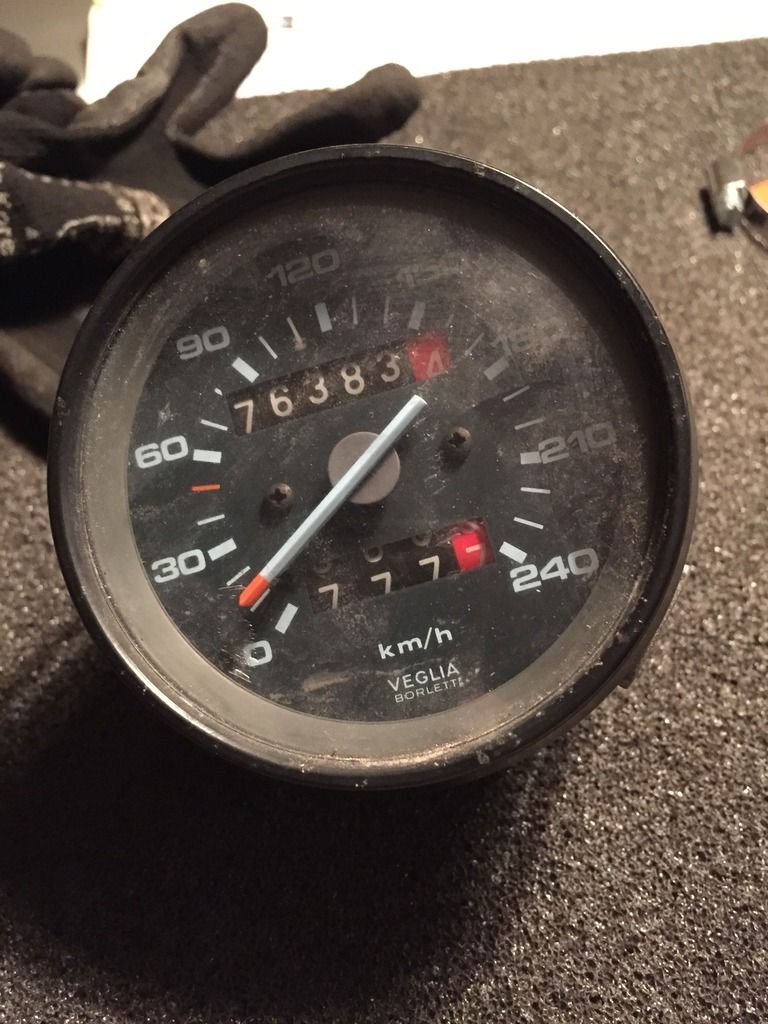
My trip meter was suddenly stuck, so in I went to repair it.


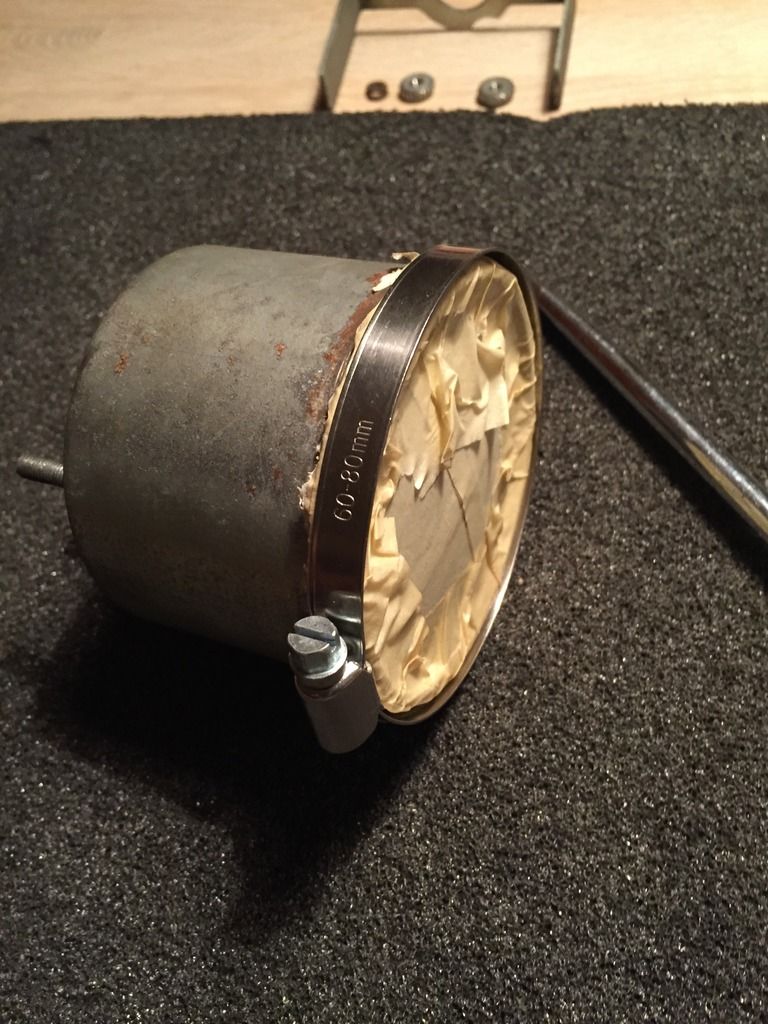
First I covered the bezel and glass/plastic with masking tape to prevent scratching. Fit a large enough clamp over the bezel so when you pry the lip up it does not skew the bezel. You only need to pry up about 1/2 of the lip  ;-T


Once you have removed the bezel, remove the 2 retainer nuts and mounting bracket. Then remove the nylon form from the trip counter reset shaft. Save that tiny screw somewhere safe  ;)


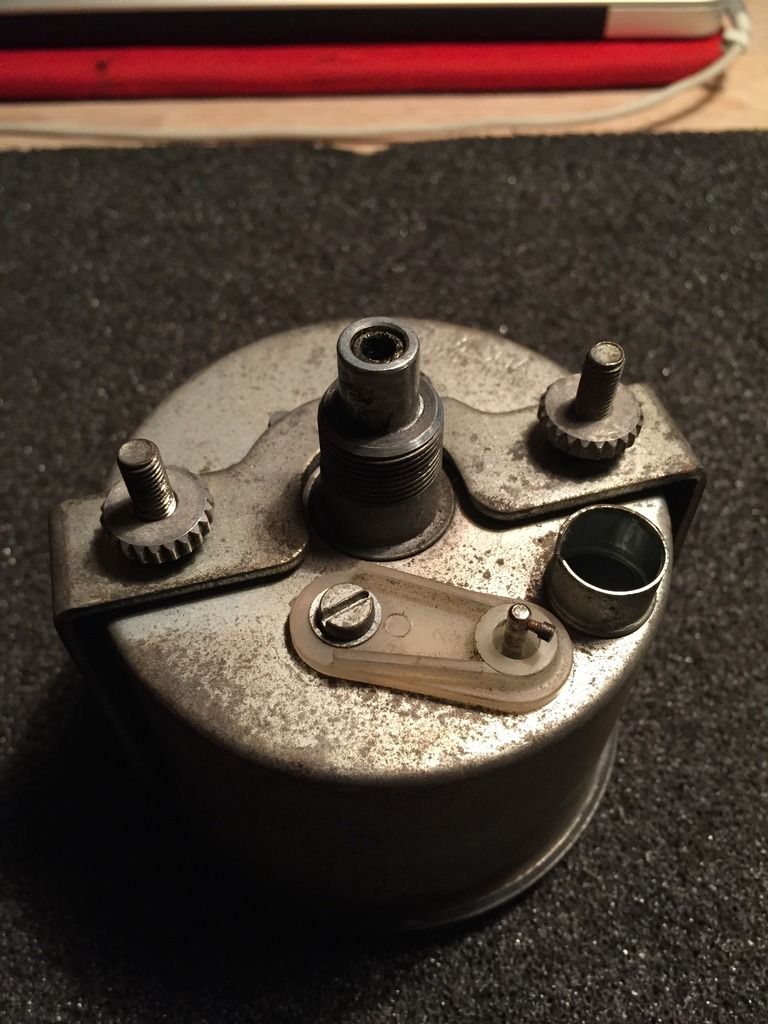
Remove the clock/moving assembly from the case


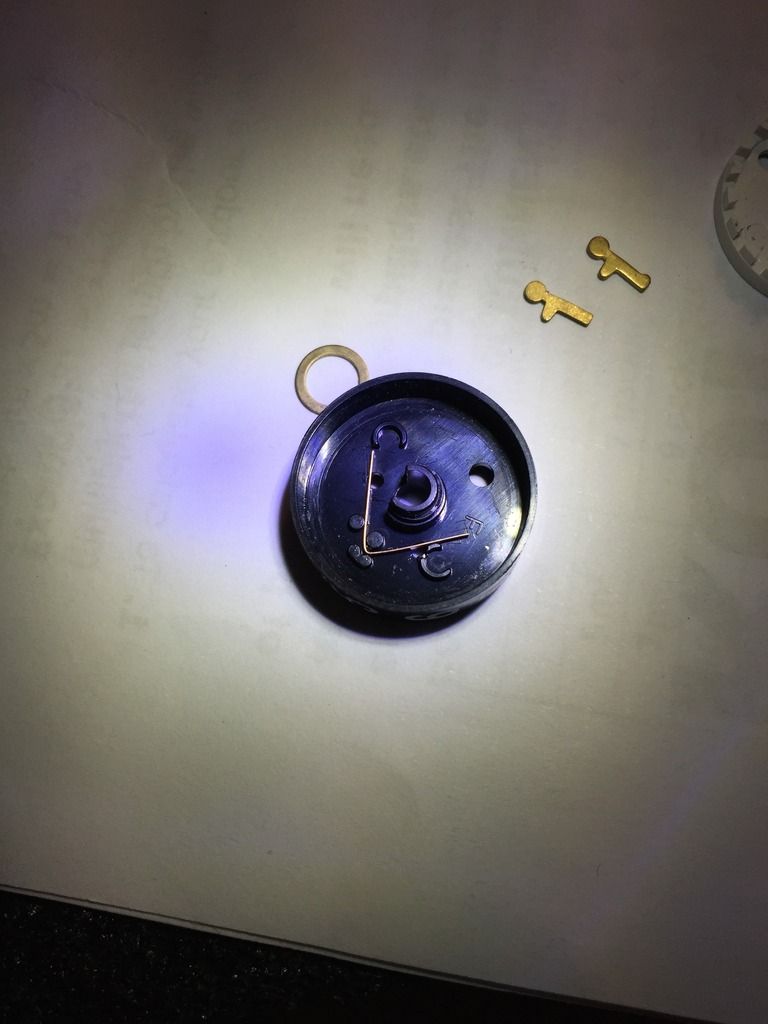
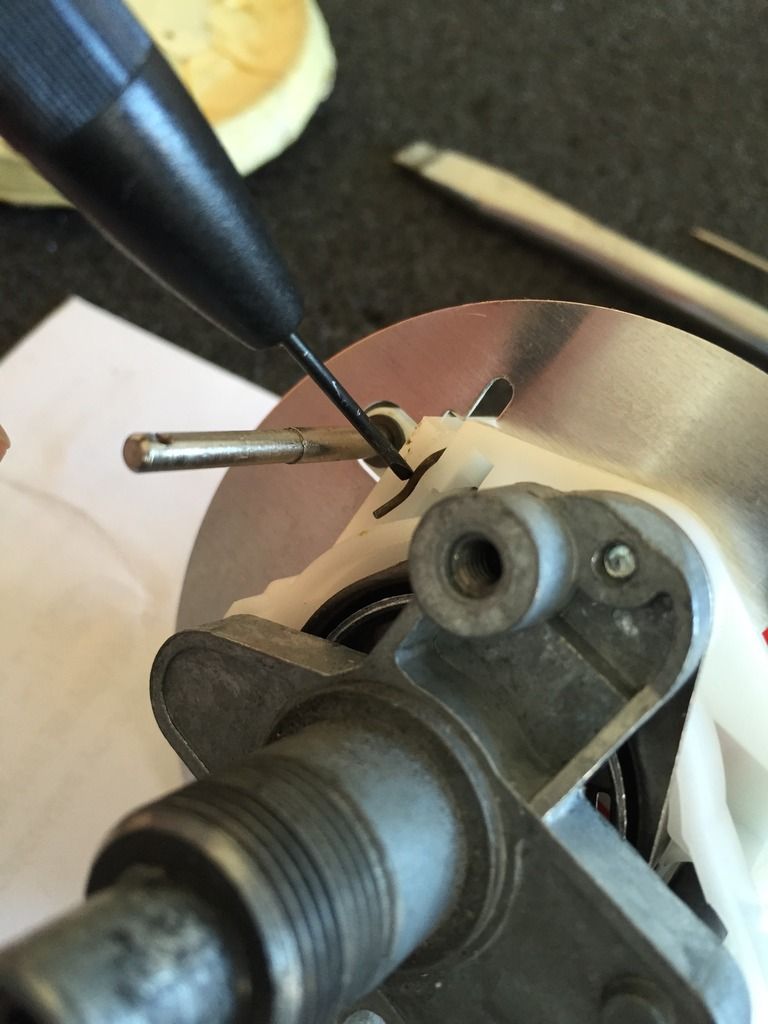
Now remove the trip meter movement from the assembly by unhooking this retainer


Here is the offending item removed and fortunately the gears weren't damaged but if they were I feel some careful application of some epoxy and delicate filing and you'd be back in action. Note the squared end tabs, they are critical during re-assembly.


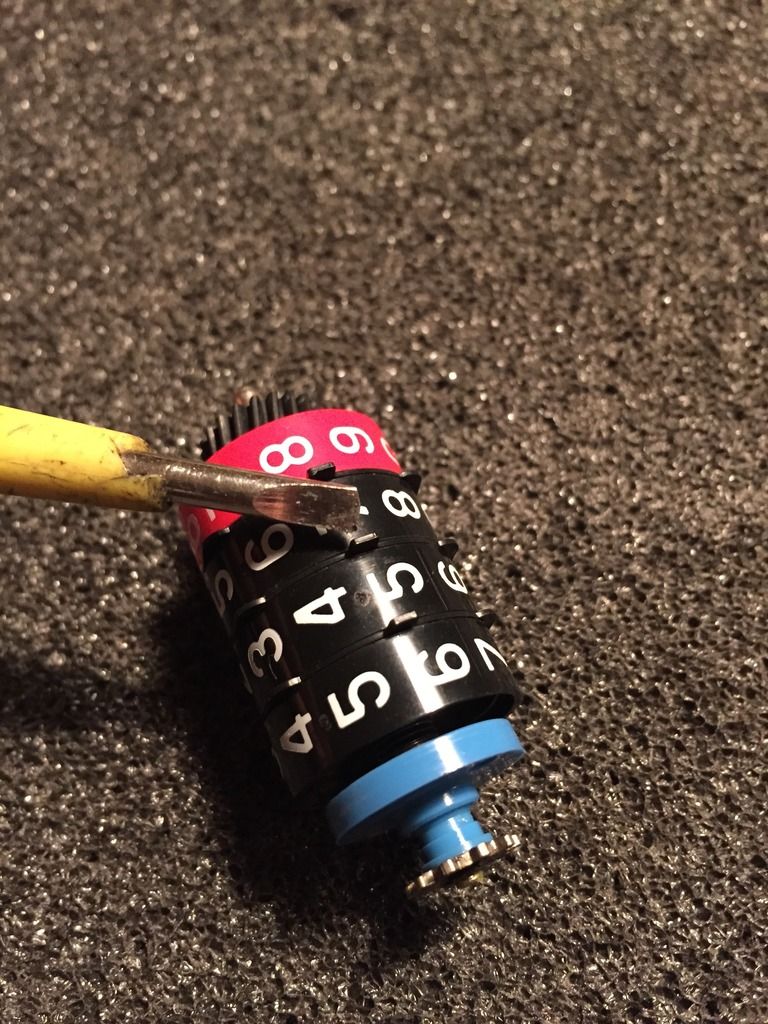
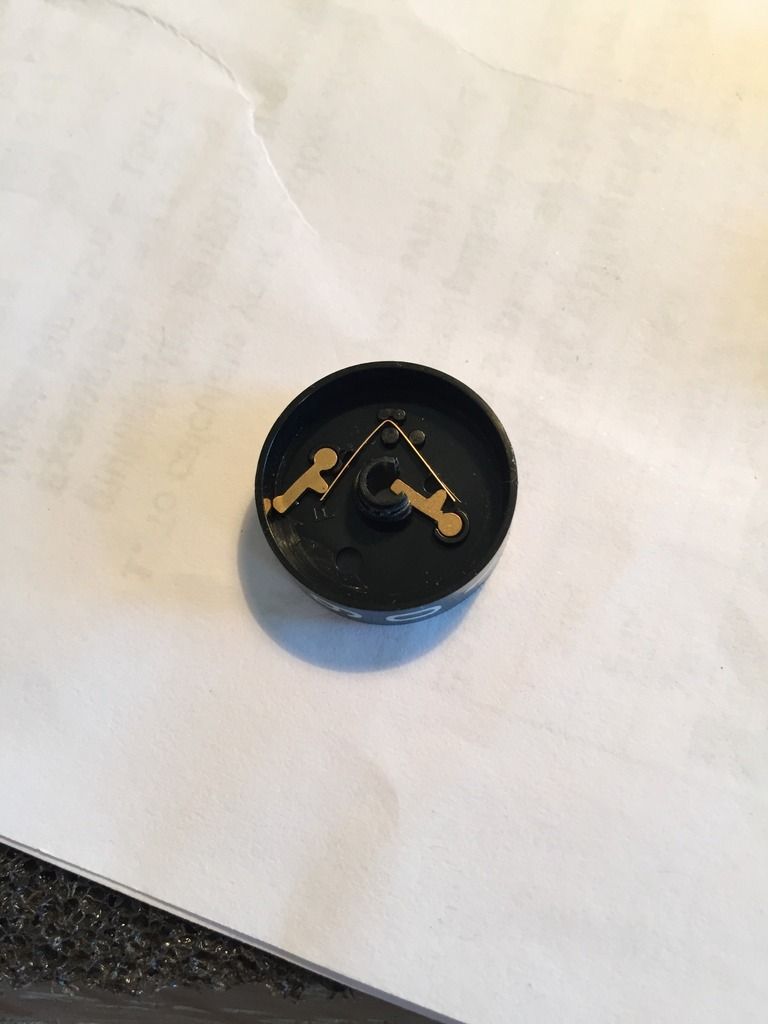
This is the movement without the trip meter drums and the slot I am pointing to is for the tabs I just mentioned on re-assembly. The copper looking tang there on the end is the master ratchet for when you rest the trip meter to zero. It just pulls out and on re-assembly it is installed after the drum assembly.


So, what's the problem? When I tried to rotate each counter drum they were stuck fast. What is meant to happen is you rotate the decimal drum in the ascending direction and then as it passes through 9 to 0 it should rotate the next drum one digit so that you count your kilometers or miles.

Let's disassemble this sucker and see what is going on in there.

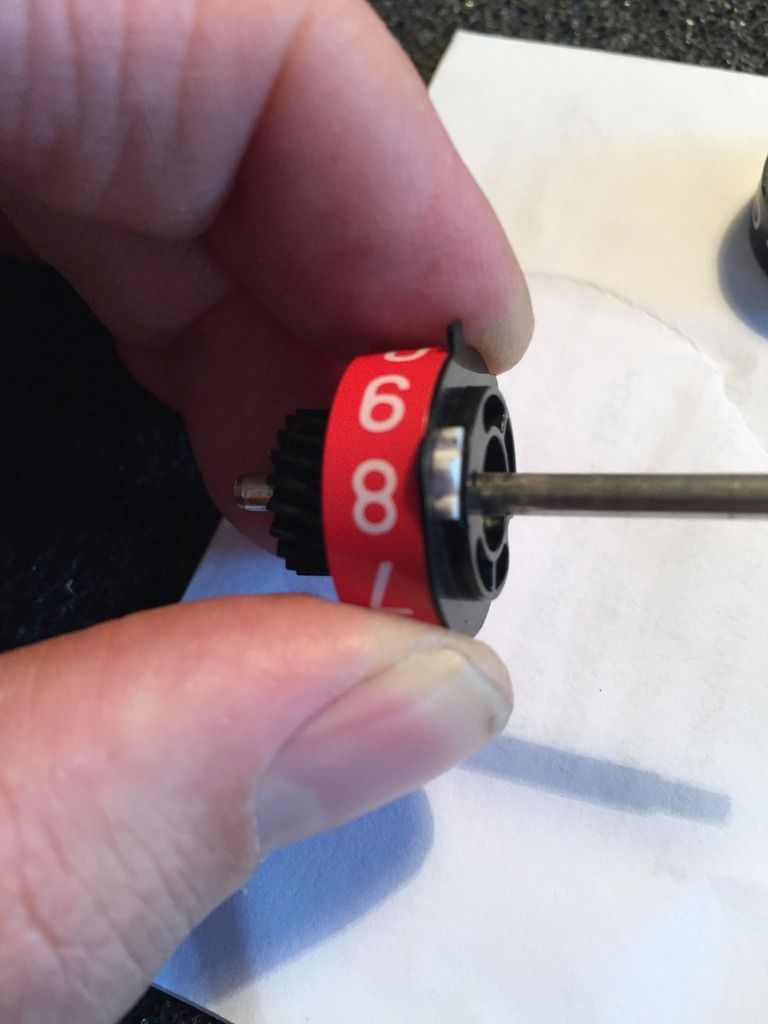
The first thing to do is remove the E clip so the gear can come off. Note here the blue disc with the flat cut into it, this is the master ratchet I mentioned before that is locked by that copper tang.


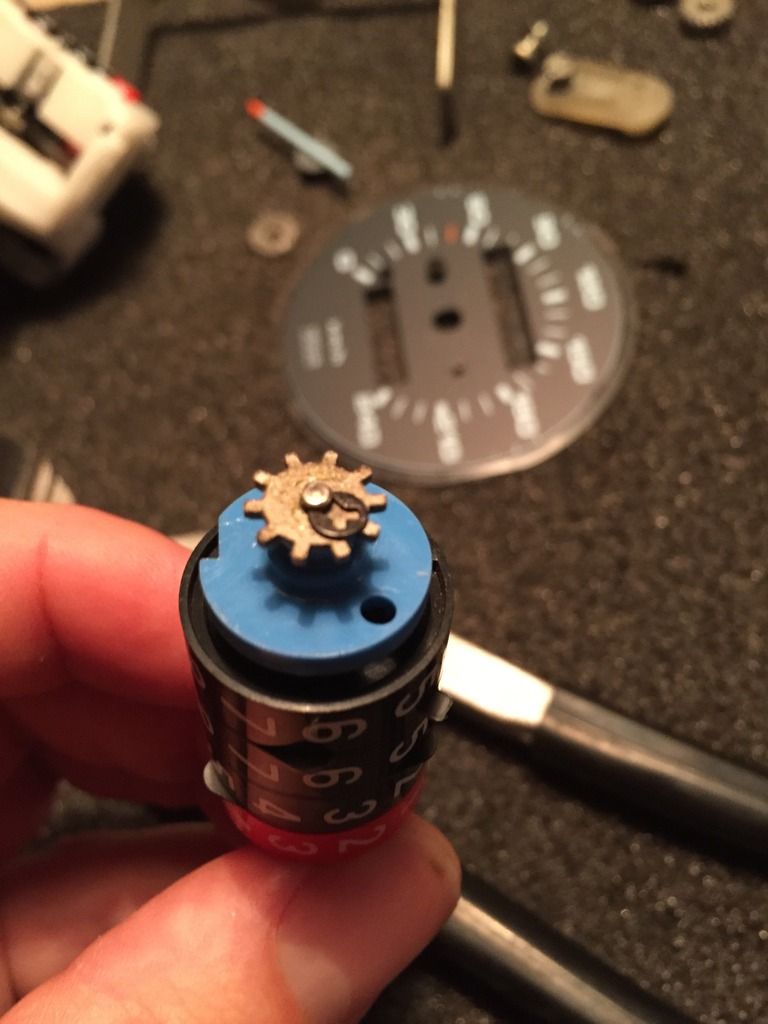
Now that the gear is removed we are confronted with this little number. I looked very carefully before proceeding and could see no other form of retainer other than an interference fit. Also here you can see the notch cutout of the shaft length ways. This is for zeroing of all the drums and engages on a spring loaded lock which we will see shortly who I refer to as the soldier without boots  :)


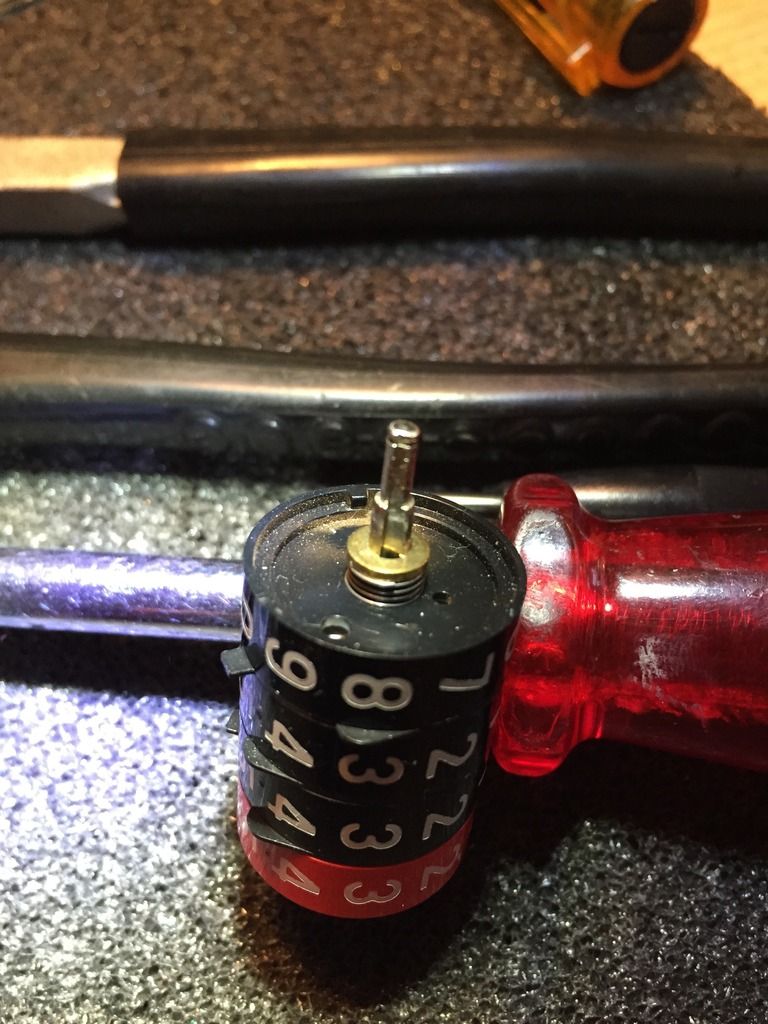
So I measured the 'pre-load' distance and  CAUTION NOW pulled off the brass retainer very carefully.


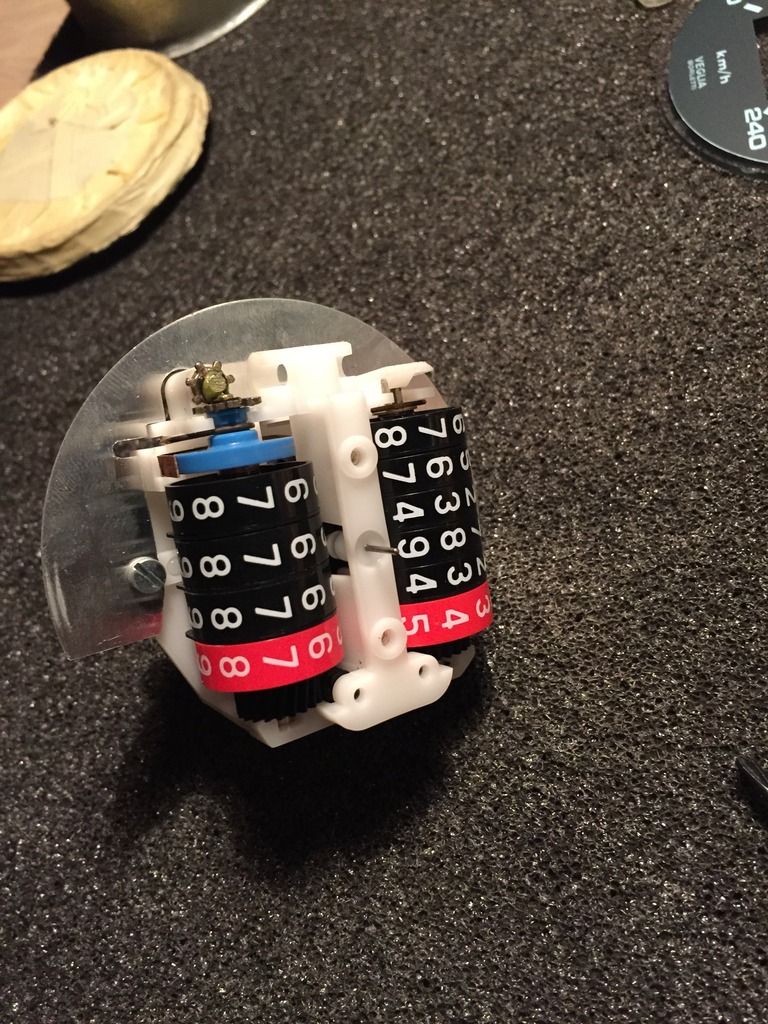
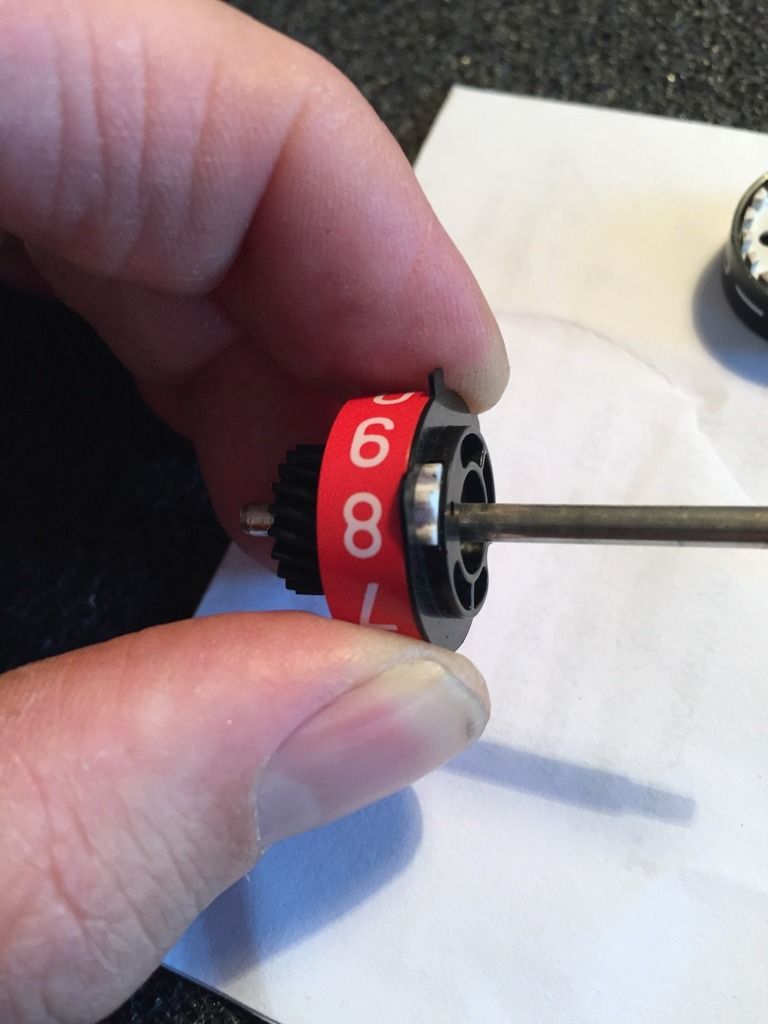
Once the pre-load is off, we can remove individual drums. Note the white gear in this image, it is what drives the next drum as you pass through 9 to 0 again. Unfortunately I deleted all the other images of it  ???


So as you dis-assemble the drums this is what you will see inside them, the two little brass soldiers and a spring, a brass washer (Note its position, I haven't got a photo of it in place) and you can see up to the right the internal ratchet mechanism which lives inside each drum.


One of the little soldiers had dismounted and was causing all the friction amongst the drums. Once I set them back in place correctly all was functioning as it should.

So, this is how the drums individually should be assembled. The soldier with the boots engages the white ratchet wheel. The one without engages the shaft notch. It took a bit of time to mount the little fellas, so be patient.


Once each drum is setup like this, you are ready to start re-assembly of the trip counter assembly.

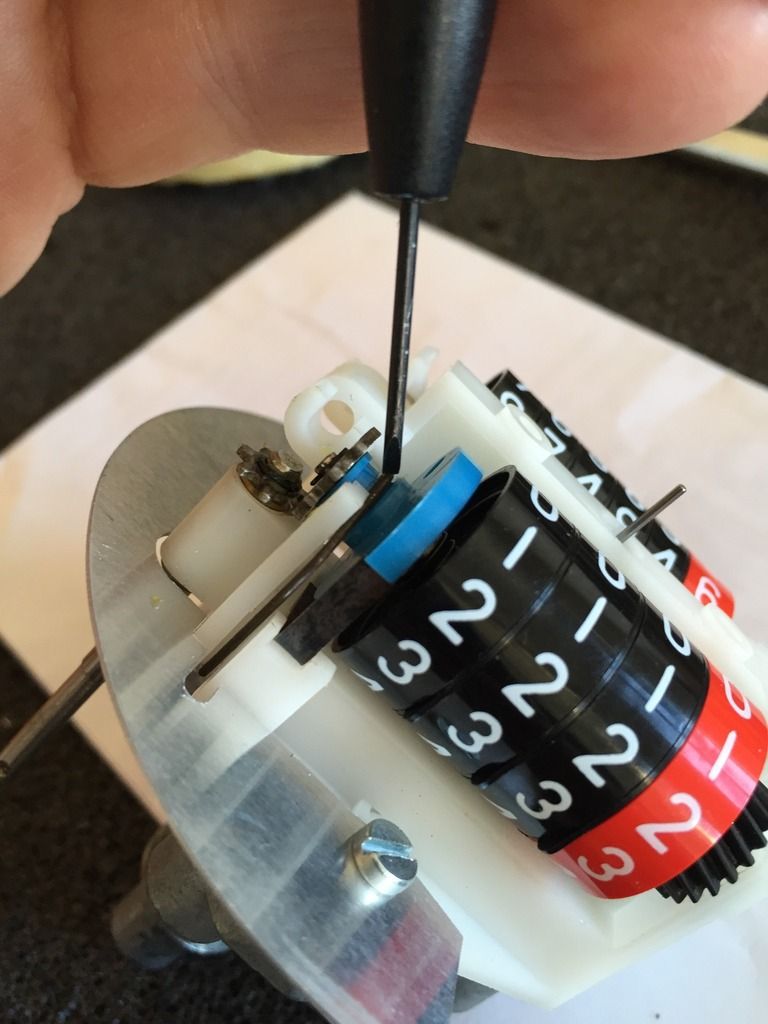
Now for each drum except the hundreds we need to insert the white ratchet wheel. I did this by applying light pressure and rotating it and then it simply seated with the soldiers boots finding their place. Then fit the backing plate which holds the gear which drives the next drum as you pass through 9 to 0. Then fit it onto the shaft remembering to key the notch


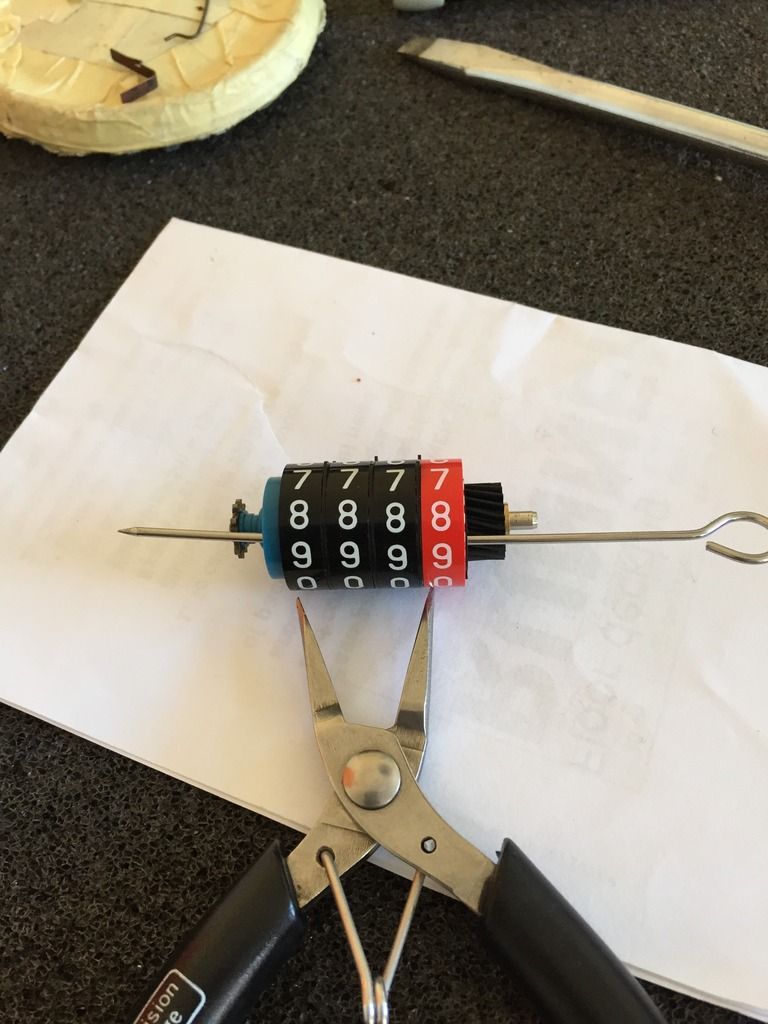
I used a small skewer as pictured here to align all the drums and wheels and backing plates as I fitted them to the shaft. It made assembly easy, especially for lining up those squared tangs, which is basically the timing of the whole operation.


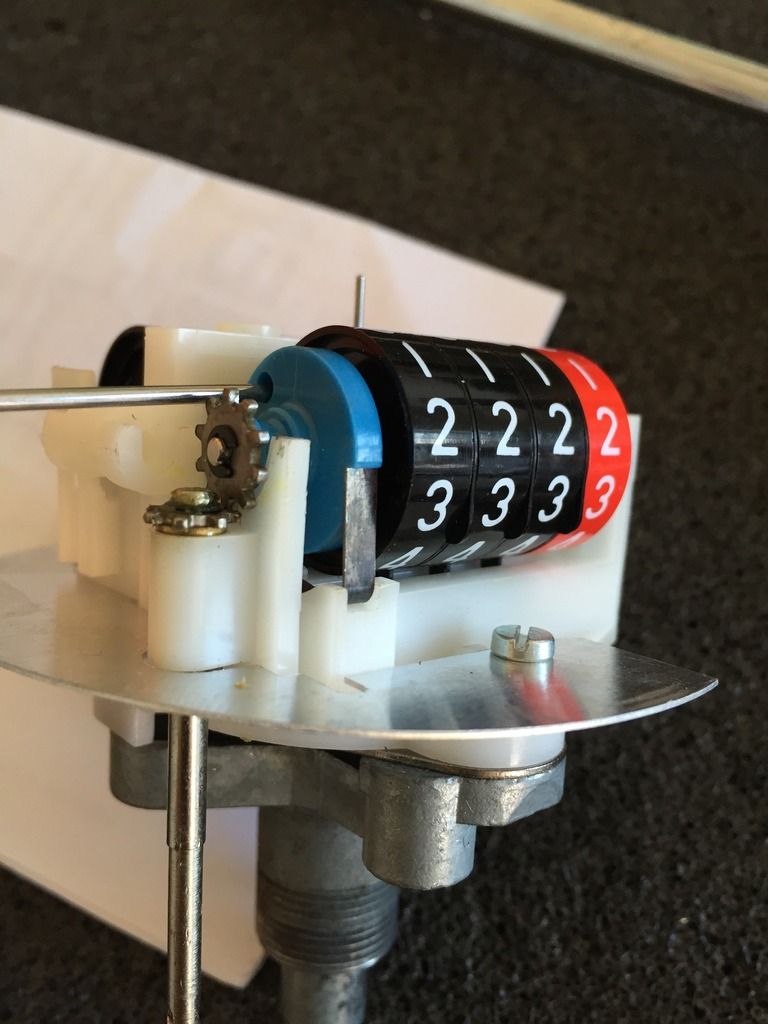
Here is the trip counter sitting in place ready for the master reset tang to be fitted with the skewer keeping everything in order.


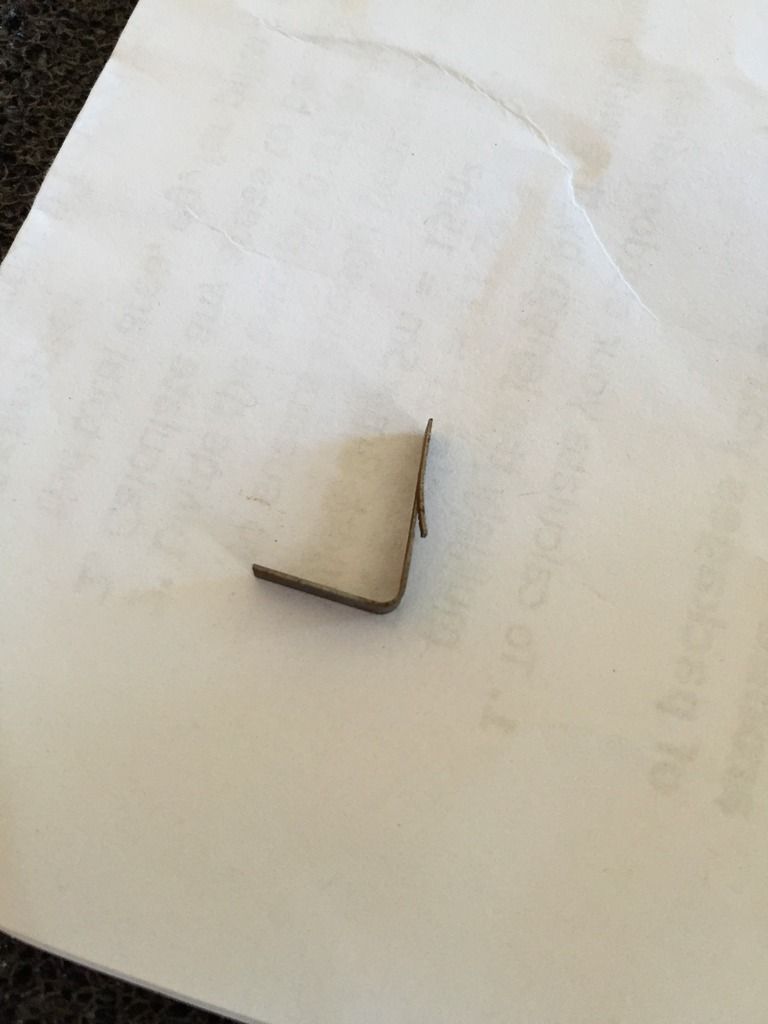
Here is the master reset tang. It can only be fitted in one direction as that locking tab needs to engage to hold it in place.


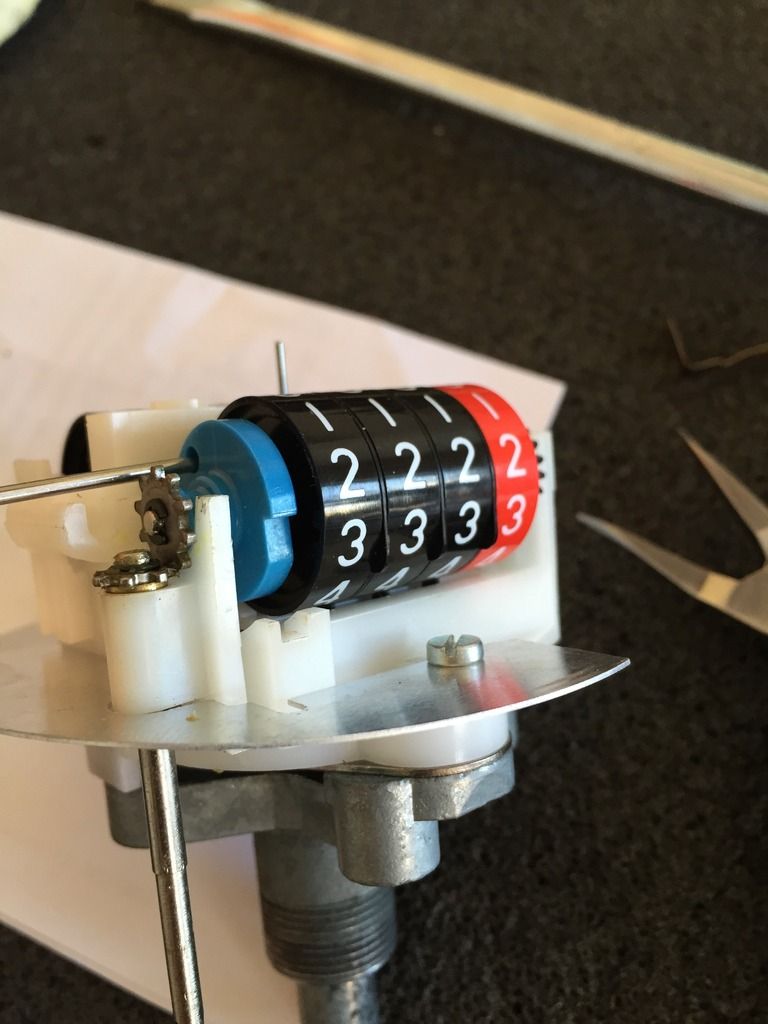
Now we have the master reset tang in place. The skewer is still holding everything in place and we are ready to fit that hook style clip which retains the whole counter assembly.


The hook clip goes over the blue disc first


Then locks on the back of the movement


Once you are satisfied you can re-assemble the case and lock/press the bezel in position and admire your handy work.


The crazing you see in the plastic is due to brake fluid. It has been there as long as I’ve had the bike. The extra one hundred meters on the odometer is from testing to ensure the gears meshed and functioned correctly.

I hope this can help some of you.

Adam.
You only went to school to learn how to learn

Adam

SP III 1990
V10 Centauro 1996

dilligaf

  • Guest
Re: Veglia Speedo Trip Counter Repair - A how to
« Reply #1 on: May 19, 2015, 10:45:39 AM »
Thank you.  ;-T  :BEER:
Matt

Offline normzone

  • Gaggle Hero
  • *****
  • Posts: 3082
  • '72 Eldo - 1980 to 1990 - '99 Bassa 2014 - 2023
  • Location: San Diego CA
Re: Veglia Speedo Trip Counter Repair - A how to
« Reply #2 on: May 19, 2015, 10:52:16 AM »
That is a very fine piece of documentation  - my compliments and thanks, and while I have that exact same problem I am far, far away from opening the instrument  :P Perhaps some day...
That's the combustion chamber of the turbo shaft. It is supposed to be on fire. You just don't usually see it but the case and fairing fell off.

Online Antietam Classic Cycle

  • Gaggle Hero
  • *****
  • *
  • Posts: 14178
  • Happily stuck in the past.
    • Antietam Classic Cycle
  • Location: Rohrersville, Maryland
Re: Veglia Speedo Trip Counter Repair - A how to
« Reply #3 on: May 19, 2015, 10:55:44 AM »
 ;-T

This will come in handy when/if I tackle repairing the tripmeter of the speedometer Matt/dilligaf sent me for my Le Mans.
Charlie

Wildguzzi.com

Re: Veglia Speedo Trip Counter Repair - A how to
« Reply #3 on: May 19, 2015, 10:55:44 AM »

Offline Vince in Milwaukee

  • Gaggle Hero
  • *****
  • *
  • *
  • Posts: 3677
  • Location: Kenosha, WI
Re: Veglia Speedo Trip Counter Repair - A how to
« Reply #4 on: May 19, 2015, 11:01:51 AM »
A good friend of mine enjoys repairing watches.  He would be impressed with your work as much as I was.  Excellent lesson. 
1984 Moto Guzzi 850 LeMans III, 1986 California II
Gone but not forgotten:
1969 Moto Guzzi Ambo, 1994 BMW K75RTw/ABS, 1996 BMW R1100RT, and 1993 BMW K75

Offline bsanut

  • Hatchling
  • **
  • Posts: 127
    • Eurotrash Jambalaya
Re: Veglia Speedo Trip Counter Repair - A how to
« Reply #5 on: May 19, 2015, 11:03:40 AM »
Yikes.  That is Rolex School, that is...

Joe
Joe Carter

Eurotrash Jambalaya

2017 V9 Bobber
2014 California Custom (sold)
2009 Stelvio (sold)
2002 EV11 (sold)
1983 California II (sold)
1974 Nuovo Falcone (sold)
2007 Griso (sold)

Offline Triple Jim

  • Gaggle Hero
  • *****
  • Posts: 5930
    • Lakeland Services Company
  • Location: North Central North Carolina
Re: Veglia Speedo Trip Counter Repair - A how to
« Reply #6 on: May 19, 2015, 11:18:24 AM »
So why did the soldier get out of place, and what did you do to prevent if from happening again?
When the Brussels sprout fails to venture from its lair, it is time to roll a beaver up a grassy slope.

Online Chuck in Indiana

  • Gaggle Hero
  • *****
  • *
  • *
  • *
  • Posts: 29452
Re: Veglia Speedo Trip Counter Repair - A how to
« Reply #7 on: May 19, 2015, 12:44:28 PM »
Thanks for taking the time to document that..  ;-T
Chuck in (Elwood) Indiana/sometimes SoCal
 
87 AeroLario
95 Skorpion tour
22 Royal Enfield Classic 3 fiddy
 "Two things are infinite: the universe and human stupidity; and I'm not sure about the universe."
Albert Einstein

Offline Groover

  • Gaggle Hero
  • *****
  • *
  • Posts: 2858
  • If it ain't broke, I'll break it.
    • Scooteropolis
  • Location: Columbus, Ohio
Re: Veglia Speedo Trip Counter Repair - A how to
« Reply #8 on: May 19, 2015, 01:30:27 PM »
Great job, thank you. I tried to scroll down this page as slowly as possible to avoid tiny parts flying off the screen  :D

Great tip too on lifting the lip on half the bezel to remove it.. that'll be nice in order to keep the nicer/original crimped side on the most visible side of the dash.
1981 Moto Guzzi V1000G5
1987 Moto Guzzi LM1000SE, a
1987 Moto Guzzi LM1000SE, b
1980 Piaggio Vespa P200E
1980 Piaggio Vespa P125X
1980 Vespa Grande Moped
1980 Vespa SI Moped
http://scooteropolis.com/

Offline flangeman_70

  • Gosling
  • ***
  • Posts: 289
Re: Veglia Speedo Trip Counter Repair - A how to
« Reply #9 on: May 19, 2015, 02:25:21 PM »
So why did the soldier get out of place, and what did you do to prevent if from happening again?

Not sure but I put it down to the drive between the unit and tens drum. I swapped this with the hundreds drum as I am never likely to cover more than 400km on a tank :o I have pushed 380km and ended up filling 20 liters of a 22 liter tank, that was tight enough.

Adam
You only went to school to learn how to learn

Adam

SP III 1990
V10 Centauro 1996

Offline Triple Jim

  • Gaggle Hero
  • *****
  • Posts: 5930
    • Lakeland Services Company
  • Location: North Central North Carolina
Re: Veglia Speedo Trip Counter Repair - A how to
« Reply #10 on: May 19, 2015, 02:30:46 PM »
Clever! 
When the Brussels sprout fails to venture from its lair, it is time to roll a beaver up a grassy slope.

Offline dan_s

  • Gosling
  • ***
  • Posts: 283
    • http://www.world-designs.co.uk/forum/member.php?u=128
Re: Veglia Speedo Trip Counter Repair - A how to
« Reply #11 on: May 19, 2015, 02:39:24 PM »
In the three veglia speedometers I opened for lubrication and cleaning, none needed disassembly of the digit wheels. These are the most fiddly bits. Squirting silicone lube was enough to get the wheels turning even better. The grease on the gears hardened. I lubed them with silicone grease. The white plastic chassis is brittle in older speedos, you must care not to exert too much pressure on it when handing.
Thanks for the photos.

Offline Stevex

  • Gaggle Mentor
  • ****
  • Posts: 961
Re: Veglia Speedo Trip Counter Repair - A how to
« Reply #12 on: May 19, 2015, 03:45:32 PM »
My trip meter works but I can't reset it to zero which is a real pain. One day I'm going to have to go in.

Offline Wayne Orwig

  • Gaggle Hero
  • *****
  • Posts: 13912
    • Hog Mountain weather
  • Location: Hog Mountain
Re: Veglia Speedo Trip Counter Repair - A how to
« Reply #13 on: May 19, 2015, 05:06:48 PM »
Anything that requires a hose clamp is 'Guzzi certified'.
 ;-T


 :BEER:


Scientist have discovered that people will believe anything, if you first say "Scientists have discovered...."

56Pan

  • Guest
Re: Veglia Speedo Trip Counter Repair - A how to
« Reply #14 on: May 19, 2015, 07:39:01 PM »
Very nice piece of work.  Shows skill.  Thanks for posting it.

canuck750

  • Guest
Re: Veglia Speedo Trip Counter Repair - A how to
« Reply #15 on: May 19, 2015, 10:17:39 PM »
Great write up, thanks for posting this!

Cheers

Jim


***Wildguzzi Official Logo High Quality 5 Color Window Decals Back In Stock***
Shipping in USA Only. Awesome quality. Back by popular demand. All proceeds go back into the forum.
http://www.wildguzzi.com/Products/products.htm
Advertise Here